Your light in the linux world

Author: koen

Easy way of managing config in Docker-compose

Ever wanted that your config files in you docker-stack updated also when you released a new version of your stack through a CI/CD pipeline? Or you where in a development phase where you are constantly changing stuff in the config but you also wanted to make sure that you knew which config was used in what release in the pipeline? Well… Maybe you should try the next trick:


 variables:
   HOSTNAME: dockerhost.tuxito.be #Host to deploy docker-compose
 Clone or Pull Repo to Remote Host
 clone:
   image: alpine
   before_script:
     - apk add openssh-client git jq curl
     - eval $(ssh-agent -s)
     - echo "$SSH_PRIVATE_KEY_ANSIBLE" | tr -d '\r' | ssh-add -
     - mkdir -p ~/.ssh
     - chmod 700 ~/.ssh
     - /usr/bin/git config --global user.email "$GITLAB_USER_EMAIL"
     - /usr/bin/git config --global user.name "$GITLAB_USER_LOGIN"
     - GIT_CLONE_URL="$(curl --silent -XGET "$CI_SERVER_URL/api/v4/projects/$CI_PROJECT_ID?private_token=$ANSIBLE_TOKEN" | jq -r '.ssh_url_to_repo')"
   script:
     - ssh -o StrictHostKeyChecking=no ansible@$HOSTNAME "printf '%s\n    %s\n' 'Host *' 'StrictHostKeyChecking no' > ~/.ssh/config && chmod 600 ~/.ssh/config"
     - ssh -o StrictHostKeyChecking=no ansible@$HOSTNAME "if [ -d "$CI_PROJECT_NAME" ]; then (rm -rf $CI_PROJECT_NAME; git clone $GIT_CLONE_URL); else git clone $GIT_CLONE_URL; fi"
 Deploy stack
 deploy:
   image: alpine
   before_script:
     - apk add openssh-client git jq curl
     - eval $(ssh-agent -s)
     - echo "$SSH_PRIVATE_KEY_ANSIBLE" | tr -d '\r' | ssh-add -
     - mkdir -p ~/.ssh
     - chmod 700 ~/.ssh
   script:
     - ssh -o StrictHostKeyChecking=no ansible@$HOSTNAME "sed -i -E "/CONF_VERSION=/s/=.*/=$CI_JOB_ID/" $CI_PROJECT_NAME/deploy.sh"
     - ssh -o StrictHostKeyChecking=no ansible@$HOSTNAME "cd $CI_PROJECT_NAME; chmod +x deploy.sh; sudo ./deploy.sh"

I’m using a gitlab-ci pipeline file here.. But the eventual purpose can be achieved using all Ci/Cd tools. It is just a matter of changing the Variable name.

More importantly this line:

ssh -o StrictHostKeyChecking=no ansible@$HOSTNAME "sed -i -E "/CONF_VERSION=/s/=.*/=$CI_JOB_ID/" $CI_PROJECT_NAME/deploy.sh"

Here you wil find the ENVIRONMENT value used in the upcoming docker-compose file CONF_VERSION. Which on his term has the value of the $CI_JOB_ID which is a baked in value of Gitlab:

CI_JOB_ID
The unique ID of the current job that GitLab CI/CD uses internally.

If you where using Bamboo for example you could use bamboo.buildNumber.

Then for the trick in your docker-compose file:


 version: "3.7"
 services:
     elasticsearch:
       image: elasticsearch:${ELASTIC_VERSION}
       hostname: elasticsearch
       environment:
           - "discovery.type=single-node"
           - "xpack.monitoring.collection.enabled=true"
       ports:
           - 9200:9200
           - 9300:9300
       networks:
           - elastic
       volumes:
         - type: volume
           source: elasticsearch-data
           target: /usr/share/elasticsearch/data
         - type: volume
           source: snapshots
           target: /snapshots
       deploy:
         mode: replicated
         replicas: 1
         placement:
           constraints: [node.hostname == morsuv1416.agfa.be]
       secrets:
         - source: elasticsearch-config
           target: /usr/share/elasticsearch/config/elasticsearch.yml
           mode: 0644
           uid: "1000"
           gid: "1000"
filebeat:
       image: docker.elastic.co/beats/filebeat:${ELASTIC_VERSION}
       hostname: "{{.Node.Hostname}}-filebeat"
       ports:
         - "5066:5066"
       user: root
       networks:
         - elastic
       secrets:
         - source: filebeat-config
           target: /usr/share/filebeat/filebeat.yml
       volumes:
         - filebeat:/usr/share/filebeat/data
         - /var/run/docker.sock:/var/run/docker.sock
         - ...
secrets:
   elasticsearch-config:
     file: configs/elasticsearch.yml
     name: elasticsearch-config-v${CONF_VERSION}
   filebeat-config:
     file: configs/filebeat.yml
     name: filebeat-config-v${CONF_VERSION}

As you can see… The name in docker stack will change but there reference to the secret (aka Config file) will be the same in docker-compose.yml.

So all there is left in the deploy.sh script that we use in the the gitlab-ci file and you are good to go:

!/bin/bash
 export ELASTIC_VERSION=7.10.1
 export ELASTICSEARCH_USERNAME=elastic
 export ELASTICSEARCH_PASSWORD=changeme
 export ELASTICSEARCH_HOST=elasticsearch
 export KIBANA_HOST=kibana
 1 is PlaceHolder. Gets changed During deploy
 export CONF_VERSION=1
 docker network ls|grep elastic > /dev/null || docker network create --driver overlay --attachable elastic
 docker stack deploy --prune --compose-file docker-compose.yml elkstack

Happy dockering!

Nexus 3 Behind Traefik V2

After A LOT of struggling to get Nexus 3 running behind Traefik2 I finally got in working, so I thought let’s share this with rest of the world… 😀

Running the GUI behind Traefik2 wasn’t a big deal… It was logging in and pushing the images to it that was a pain in the ass…

So… For everyone that is struggling with the same issue… Here is the answer… (I hope for you). And the problem wasn’t even my docker-compose file… But a setting IN Nexus 3…

My Setup is a docker swarm with 5 nodes. So just keep in mind that my docker-compose file is for a swarm (includes deploy settings and stuff). As an extra I also run my persistent storage on NFS. So it doesn’t matter on which worker the conatiner get’s deployed… So let’s start with the compose files:

Traefik V2

version: "3.7"
networks:
  proxy:
    driver: overlay
    external: true
  default:
    driver: overlay

########################### SERVICES
services:
  ############################# FRONTENDS

  # Traefik 2 - Reverse Proxy
  # Touch (create empty files) traefik.log and acme/acme.json. Set acme.json permissions to 600.
  # touch $DOCKERDIR/traefik2/acme/acme.json
  # chmod 600 $DOCKERDIR/traefik2/acme/acme.json
  # touch $DOCKERDIR/traefik2/traefik.log
  traefik:
    image: traefik:v2.2
    environment:
      - AWS_HOSTED_ZONE_ID=${AWS_HOSTED_ZONE_ID}
      - AWS_ACCESS_KEY_ID=${AWS_ACCESS_KEY_ID}
      - AWS_SECRET_ACCESS_KEY=${AWS_SECRET_ACCESS_KEY}
    hostname: traefik
    ports:
      - "80:80"
      - "443:443"
    deploy:
      restart_policy:
         condition: on-failure
      mode: replicated
      placement:
        constraints:
        - node.role == manager
        - node.hostname == elb.mydomain.com
      labels:
        - "traefik.enable=true"
        - "traefik.docker.network=proxy"
        - "traefik.http.routers.api.entrypoints=https"
        - "traefik.http.routers.api.rule=Host(`elb.mydomain.com`)"
        - "traefik.http.routers.api.service=api@internal"
        - "traefik.http.routers.api.tls=true"
        - "traefik.http.routers.api.tls.domains[0].main=mydomain.com"
        - "traefik.http.routers.api.tls.domains[0].sans=*.mydomain.com"
        - "traefik.http.routers.api.tls.certresolver=mytlschallenge"
        - "traefik.http.routers.api_http.entrypoints=http"
        - "traefik.http.routers.api_http.rule=Host(`elb.mydomain.com`)"
        - "traefik.http.routers.api_http.middlewares=traefik-redirectscheme"
        - "traefik.http.middlewares.traefik-redirectscheme.redirectscheme.scheme=https"
        - "traefik.http.services.api.loadbalancer.server.port=8080"
        ## Middlewares
        - "traefik.http.routers.traefik-rtr.middlewares=middlewares-basic-auth@file"
    command:
      - --api.insecure=true # set to 'false' on production
      - --api.dashboard=true
      - --api.debug=false
      - --log.level=WARN
      - --providers.docker=true
      - --providers.docker.swarmMode=true
      - --providers.docker.exposedbydefault=false
      - --providers.docker.network=proxy
      - --entrypoints.http.address=:80
      - --entrypoints.https.address=:443
      - --certificatesresolvers.mytlschallenge.acme.dnsChallenge.resolvers=1.1.1.1:53,8.8.8.8:53
      #- --certificatesResolvers.mytlschallenge.acme.caServer=https://acme-staging-v02.api.letsencrypt.org/directory # Generates LE test certificates.  Can be removed for production
      - --certificatesResolvers.mytlschallenge.acme.dnsChallenge=true
      - --certificatesResolvers.mytlschallenge.acme.dnsChallenge.provider=route53
      - --certificatesresolvers.mytlschallenge.acme.email=${LE_EMAIL}
      - --certificatesresolvers.mytlschallenge.acme.storage=/letsencrypt/acme.json
      - --serverstransport.insecureskipverify=true

    volumes:
      - "nfs_traefik:/letsencrypt"
      - /var/run/docker.sock:/var/run/docker.sock:ro
    networks:
      - proxy
volumes:
  nfs_traefik:
    external: true

Nexus 3:

version: "3.7"
services:
  nexus:
    image: sonatype/nexus3
    environment:
      - "REGISTRY_HTTP_RELATIVEURLS=true"
      - "TZ=Europe/Brussels"
    deploy:
      mode: replicated
      replicas: 1
      restart_policy:
         condition: on-failure
      placement:
        constraints:
          - node.role == worker
      labels:
        - "traefik.enable=true"
        # Nexus Interface
        - "traefik.http.routers.nexus.entrypoints=https"
        - "traefik.http.routers.nexus.service=nexus"
        - "traefik.http.routers.nexus.rule=Host(`nexus.mydomain.com`)"
        - "traefik.http.routers.nexus.tls.certresolver=mytlschallenge"
        - "traefik.http.services.nexus.loadbalancer.server.port=8081"
        # Regsitry Endpoint
        - "traefik.http.routers.registry.rule=Host(`registry.mydomain.com`)"
        - "traefik.http.routers.registry.tls=true"
        - "traefik.http.routers.registry.service=registry"
        - "traefik.http.routers.registry.tls.certresolver=mytlschallenge"
        - "traefik.http.services.registry.loadbalancer.server.port=5000"
        - "traefik.docker.network=proxy"
    volumes:
      - "nexus_data:/nexus-data"
    networks:
      - proxy
    ports:
      - "8081:8081"
      - "5000:5000"

volumes:
  nexus_data:
    driver: local
    driver_opts:
      type: nfs
      o: addr=192.168.86.12,rw
      device: ":/volume1/Docker/NexusData"
networks:
  proxy:
    external: true

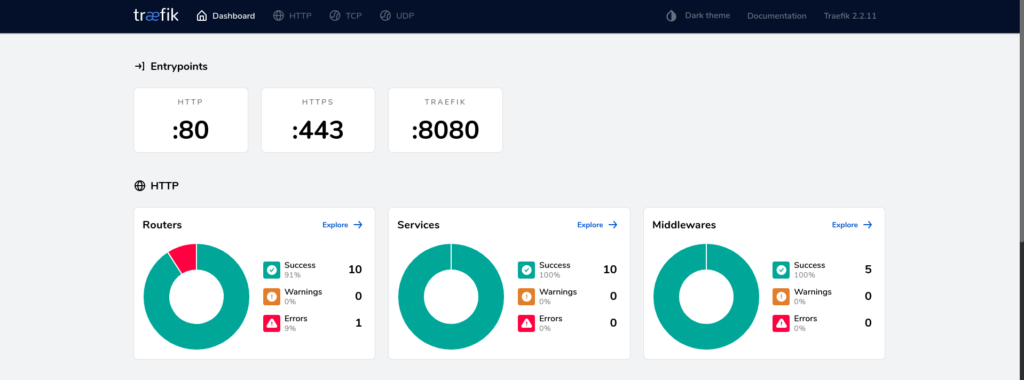
If you deploy these 2 compose files (replacing mydomain.com with your domain) you should have a running traefik V2 (with GUI, on elb.mydomain.com), a nexus running on nexus.mydomain.com and a repository endpoint on registry.mydomain.com.

The first time you open nexus you will be asked to give the admin user and the password… You can find this password under /nexus-data/admin.password in your container or nfs share if you did the same as me. Afterwards, just follow the setup.

Let’s create a Docker repository
Go to –> Settings –> Repositories –> Create Repository

  • Give the name of your repository
  • Check the HTTP connector and add port 5000 (the port you mentioned in the traefik labels for the repository url)
  • If you want to allow anonymous pulls, you can check that too (optional)
  • And I’ve also enabled the Docker V1 api (optional)
  • Click on “Save”

Now, if you try to login…

koen@pop-os:~/Projects/Docker/docker-ha/build$ docker login -u admin -p Password https://registry.mydomain.com:5000
Error response from daemon: Get https://registry.mydomain.com:5000/v2/: dial tcp 192.168.86.200:5000: connect: connection refused
OR
koen@pop-os:~/Projects/Docker/docker-ha/build$ docker login -u admin -p Password https://registry.mydomain.com
Error response from daemon: login attempt to https://registry.mydomain.com/v2/ failed with status: 404 Not Found

After A LOT of Googling around… I finally found the solution to this problem… Which wasn’t the traefik config… So here it comes… 😀

Go to Settings –> Realms and add the Docker Bearer Token Realm…

Now try to login again…

koen@pop-os:~/Projects/Docker/docker-ha/build$ docker login -u admin -p Password https://registry.mydomain.com

Login Succeeded

General Tips & Tricks

I dedicate this blog post to all the several tips and tricks I came across the web. I will add the source of the tip/trick also. Maybe you can find more for you on the source that I didn’t add.

VIM Tips & Tricks

When you want to convert some ENV variables to lower… (I needed this to create a vault file in Ansible for the values of some environment values)

ggVGu

Or to Upper case:

ggVGU

Source: https://coderwall.com/p/anvddw/vim-convert-text-to-lowercase-or-uppercase

Adding git tag to release in Bamboo

If you want to create a new version for your package in bamboo, you can add the version git tag to your package in Bamboo with following steps:

  • Add a script task in your build plan with following contents:

git_tag="$(git ls-remote --tags ${bamboo.planRepository.repositoryUrl} | cut -d/ -f3- | awk '/^[^{]*$/{version=$1}END{print version}')"
echo "git_tag=$git_tag" > git_tag.txt

This will strip the version tag from the git commit and added this to a txt file located in a working subdirectory package/apps/myapplication

  • Next you’ll need to inject the version into Bamboo. you can do this by adding a task “Inject Bamboo Variables”:

Now we can reuse this bamboo variable in a build plan by adding ${bamboo.myapplication.git_tag}

© 2025 TuxITo

Theme by Anders NorenUp ↑